STEP 1
Measure the Pipe
The first step in joining the pipe together is to measure the long lengths of pipe.
Pro Tip
Measuring the pipe correctly is important to ensure there will be enough pipe inside the fitting to make a good connection — touching the fitting shoulder. Pulling the joint to make the pipe fit will stress the joint, increasing the risk of failure.
STEP 2
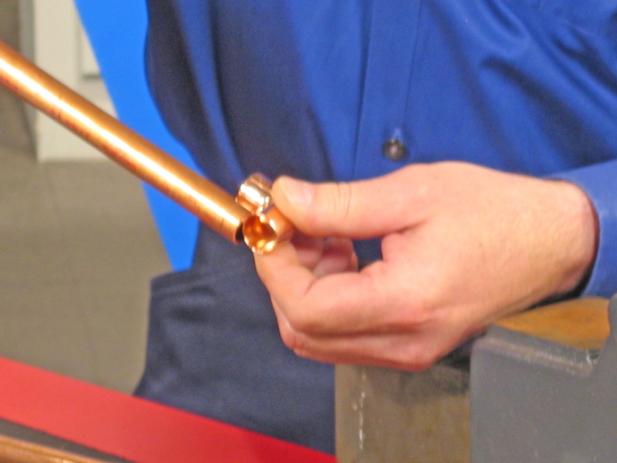
Mark the pipe, and then cut the pipe using a pipe cutter. It’s crucial that the cut is square; therefore, don’t use a hacksaw for cutting copper pipe. Using a pipe cutter is simple. Adjust the wheels so the blades push into the pipe, but be careful not to over tighten or you could pinch the pipe — bending it out of round. Turn the cutter around the pipe (Image 1), tightening it slightly after every two or three turns. The pipe will eventually come off. The edges of the pipe will be sharp, so be careful. The same rules of measuring used for copper pipe apply with CPVC. Always leave enough pipe for the fitting to fit snug into the fitting’s shoulder (Image 2). PVC has its own tools for cutting. Note: The cut should be square, or it could create a weak spot in the joint. A ratchet cutter is one of the best options for cutting PVC. Open up the tool, put it into position, and then squeeze the handle until the blade comes into contact with the pipe (Image 3). Make sure the blade is straight, and then squeeze the handle until the blade goes all the way through.
STEP 3
Clean and Solder the Pipe
When it comes to joining copper pipe, like anything else, metal oxidizes. The metal reacts with the air and deteriorates over a long period of time. This makes it difficult when soldering because it won’t adhere as well. In this case, clean the pipe before soldering. Use a piece of emery cloth or a wire brush that fits around the entire pipe. Scrub the pipe past the area where the fitting will be placed, and then slide the brush tool onto the pipe and rotate several times. The area should be shiny when finished. You’ll also want to clean the insides of the fitting, and then coat it with flux using a brush designed for this purpose. Flux cleans the area and etches the surface so that solder will adhere better.
STEP 4
Remove the Burrs from the PVC
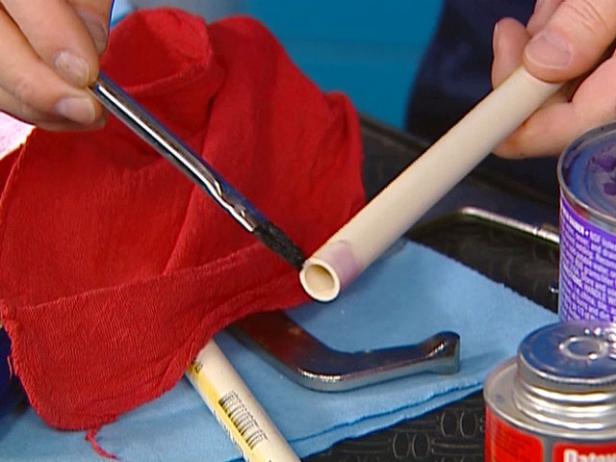
After a cut has been made, remove the burrs from the inside and outside of the pipe. If this isn’t done, it could compromise the integrity of the joint. A file or small knife should do the job. With CPVC, make sure that everything is as clean as possible. Wipe the pipe and the inside of the fitting clean. Do a final cleaning by applying a coat of PVC cleaner primer. The cleaner primer will remove any excess dirt and any manufacturer printing on the pipe. Wipe the brush around the pipe and inside the fitting a few times until everything is clean.
STEP 5
Light the Torch
Soldering or sweating a joint is the next step. Note: Make sure all safety gear is in place, such as a fire extinguisher, soldering pad and safety glasses. If you’re working inside of a wall, you may want to use a mister to wet the area around the torch.
Using lead-free solder, you’ll need a really hot flame, especially with 3/4″ or larger pipe. Mapp gas would work great in this situation. It’s a combination of acetylene and propane, which burns consistently hot. These cylinders can be purchased at local home centres. Light the torch by opening the gas, and then pressing the igniter button. Adjust the flame so that the blue flame is maximized.
STEP 6
Spool Solder
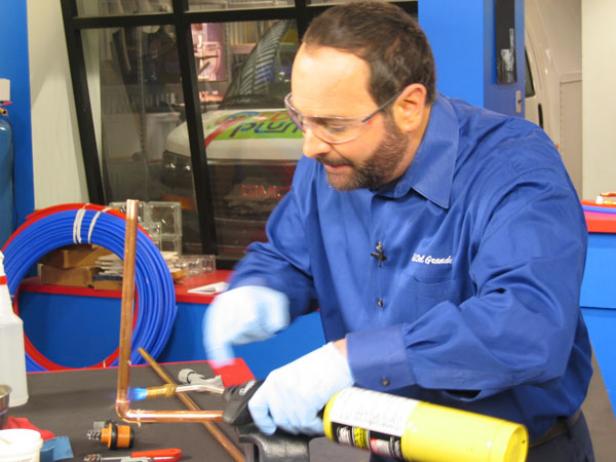
Spool out about 1′ of solder, and then move the flame back and forth on the joint. To help ensure uniform heating, keep the flame moving around the fitting. The colour of the pipe will determine when it’s time to apply the solder. The copper will take on a shiny appearance, and the flux will melt. Touch the lip of the solder to the pipe; f it’s hot enough, the solder will melt and get pulled into the joint. Make sure to solder around the entire joint.
STEP 7
Apply the Solder
Always try to work from the lowest part of the joint to the highest. The high side will stay hot longer, so you will have enough time to apply the solder. If the joint cools off too much, pass the flame of the torch back and forth, being careful not to overheat the area.
Wipe the joint before the solder cools. Shut off the flame on the torch, and then give the pipe plenty of time to cool. Always test the joint by charging the line with water or air before you close up the area.
STEP 8
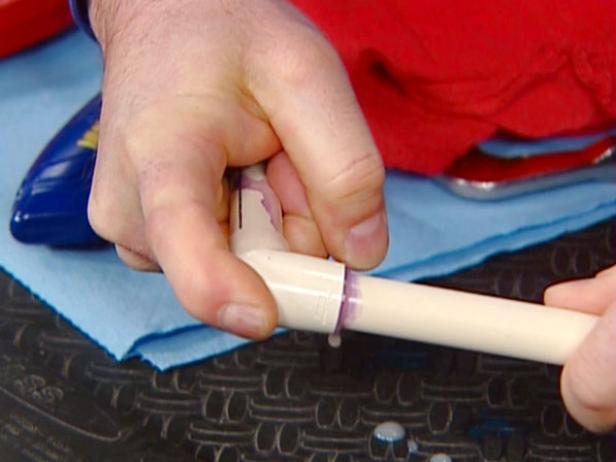
Apply Cement
Once the primer has dried, apply a thick coat of cement around the pipe, and then inside the fitting. Immediately put the fitting onto the pipe and make a 1/4 to 1/2 turn. This motion ensures that the cement will be evenly distributed inside the joint. Hold the fitting in place for a few seconds to keep the two pieces from pushing apart. There should be an even bead of cement around the joint. Let it dry one to two hours.
Note: Use cement specifically for CPVC because it’s designed to work with pressurized lines.

